By Patrick Villanueva, Media Lab Assistant
Adobe Photoshop is known as the best program to edit images, and it's something we were taught to master in art school for creative industry practice. There are plenty of powerful features right out of the box, and it's more than just adding filters like it is with Instagram. At the Media Lab, we have Photoshop available to use but I wouldn't expect anyone to have a copy at home or on their personal computers. Subscription plans for Adobe's Creative Suite can be quite expensive, and it adds up over time. This doesn't make sense for an occasional user to have.
Thinking about accessible programs for all patrons, I wanted to talk about GIMP. It's an open source alternative to Photoshop and an acronym for GNU Image Manipulation Program. When talking about open source, this means it's free to download and use. It's available for Mac, Windows and Linux. There are no strings attached, and it's maintained by dedicated volunteers. Developers contribute to open source applications to collaborate on something bigger than themselves, while simultaneously opening opportunities in the software community. I digress, but just know that open source is awesome for the technology world and its users.
Today, I'll be showing some of the basic things I often do in Photoshop but using GIMP instead. I'll go with resizing images or adjusting resolution, cropping, adjusting contrast, color correction, using the clone stamp tool and exporting images for the web.
How to Resize Images and Fix Resolution
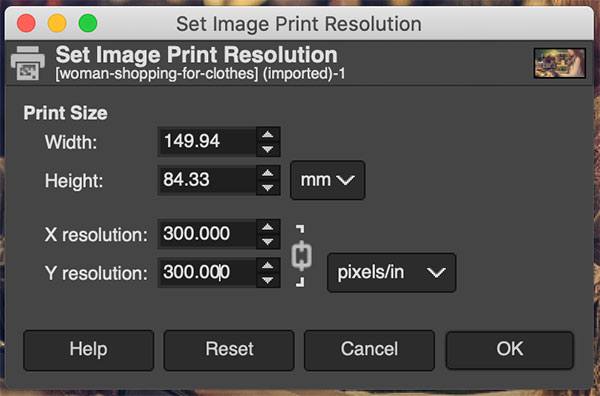
In GIMP, select: Image > Print Size.
When changing resolution, Photoshop automatically adjusts the width/height. GIMP's option is a little more explicit with both horizontal and vertical resolutions rather than one value to account for both. To do this, ensure the circular link between the two resolution values is closed. Clicking on the link toggles it to be open/unlinked or closed/linked. If linked, changing the value for “X resolution” (width resolution) to 300 automatically updates “Y resolution” (height resolution) to be the same. This does not apply if you unlink the values. See image:
The closed link also allows you to maintain the width/height ratio if you need to resize the image to a specific value. Again, enter in a value for either width or height to see how that works.
How to Crop Images
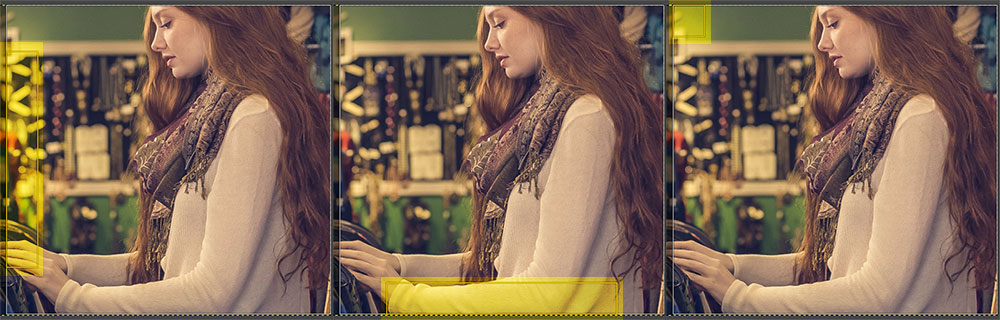
The crop tool in Gimp works and looks similar to Photoshop. Select the tool, enclose your selection within the image, and simply press Return. As you hover over the edges, you will also see a "handle area" that can be used to adjust your selection. The corner boxes will allow you to adjust both horizontal and vertical selections, while the upper/lower and left/right rectangles will respectively adjust vertical and horizontal selections. I’ve attached an image with the handle areas highlighted in yellow.
To undo your changes, the typical undo command should do. And to cancel your crop before committing, press Esc.
How to Adjust Contrast and Color Correct
I didn't know how overlooked and important these were until I began working as a Graphic Designer. With all post-processed images, follow this blueprint: 1) adjust levels and 2) color correct.
The photo example I'm using here is from Shopify's free stock photography site called Burst. The original image, taken by Matthew Henry, seems a little too green and faded here. He may or may not have intended these effects, and this is why we fix this in post-processing.

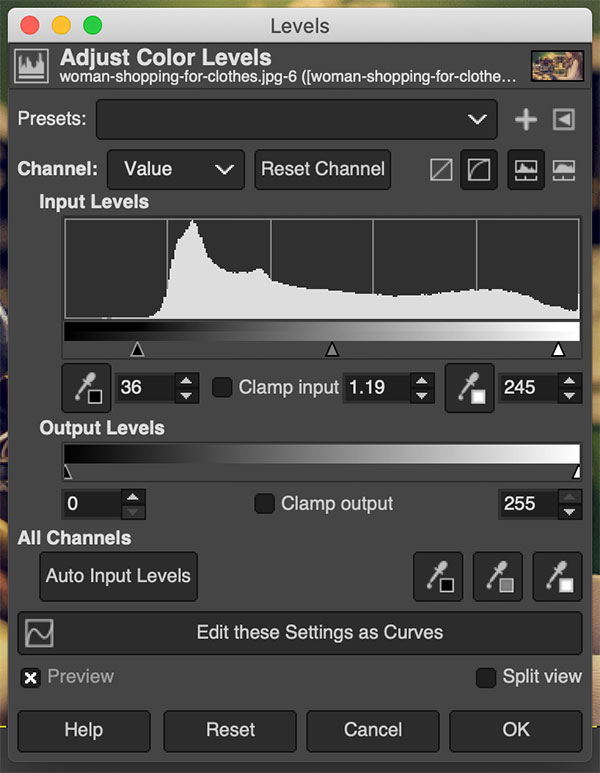
Adjusting levels in GIMP is a similar process to Photoshop. In Gimp, select: Colors > Levels. Focus on the graph, which has three marker arrows at the bottom. These help to produce a clearer image. The black arrow refers to the darker regions, gray for midtones, and white for the lighter sections. Align the black arrow where the curve begins its ascent, move the midtones slightly to the left, and move the white arrow slightly to the left. See the levels window and notice the difference in contrast.

Color Correcting uses the Color Balance features. In Gimp, select: Colors > Color Balance.
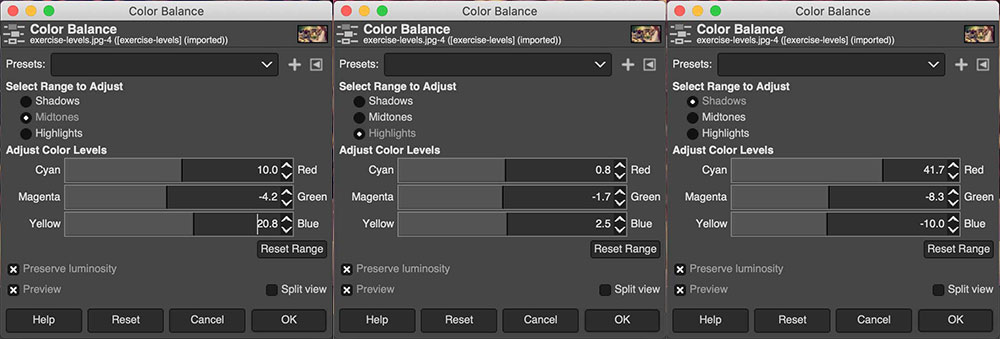
So, the main tool we're given is a set of 3 sliders that adjust levels for cyan/red, magenta/green and yellow/blue. They can be adjusted in context to shadows, midtones and highlights. Start with midtones, then go to the others.
GIMP has a bit of a wonky tool for this and gives us a cursor that not only moves the slider left and right but can move in an upward/downward motion to do the same exact thing. Play around with this to see how it works. Color Correcting takes some practice but use your best judgment. Start to move the cyan/red slider. If you notice it become too cyan (moving left/down), you've gone too far. If you notice it become too red (moving right/up), you've also gone too far. Determining the sweet spot is exactly what you're supposed to do.
Now, apply the same practice for magenta/green. Move left (or down) to move towards magenta and move right (or up) for more green. Again, find the sweet spot but for magenta and green. The same applies for yellow and blue. Sometimes, it helps to move the sliders to the extreme left or right to understand what’s best.
Switch to the other tones (shadows and highlights) and do the same for each slider. That's a total of 9 sliders to evaluate. You can see my settings below for each.

Congratulations, you just learned how to color balance a photo! You can see the difference between the original photo and color-corrected version. This might still be a little more red than I want, but you're free to go through the process again and make different decisions.
How to Use the Clone Stamp Tool
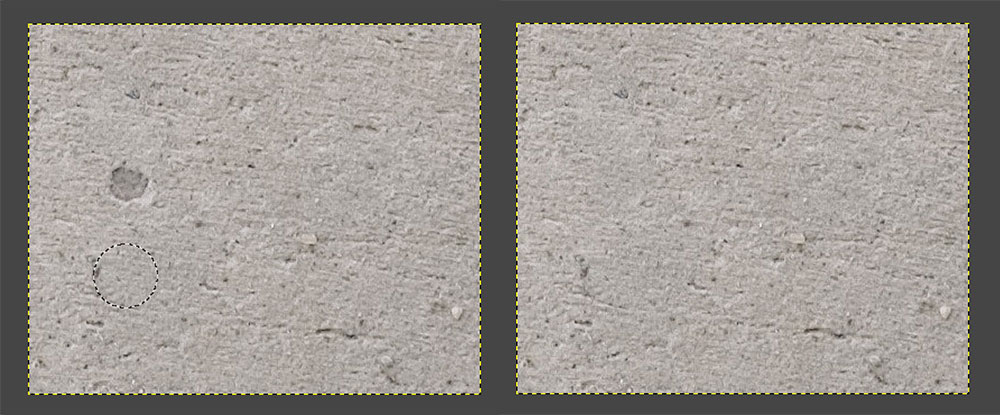
The Clone Stamp tool can be used to eliminate scratches and other type of image imperfections. Identify the problem area, and what portion of the image you'd like to duplicate. In this example, I've chosen an image of a wall made of cement. I will patch the larger hole with similar texture right below it. This is an easy fix.
-
Select the Clone Stamp tool.
-
To sample/copy a section, press Command + click (for Mac) over that section with the dotted circle selector. For PC, press Control + click.
-
Click over the area you want to fix.
-
Repeat as needed.
How to Save Images for the Web
Follow these steps to optimize images for the web in GIMP:
-
Select File > Export as...
-
Name your file in the prompt accordingly
-
In the lower left corner of the window, click on the "plus" to expand the "Select File Type" and select your preferred format (i.e. jpg, png, gif)
-
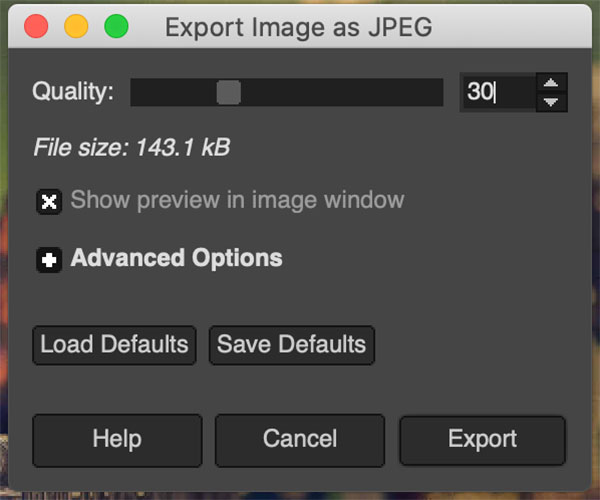
Under the new window “Export Image as (selected format),” check the box for "Show preview in image window." Other notes:
-
The estimated size of the file changes as the quality of the image is altered. In the example I'm using, a value of 30 gives me a good optimized file.
-
The preview is shown in your workspace, and you'll notice how it degrades at low values.
-
In that same "Export Image as" window, click on the Export button.
Other Thoughts and Resources
For more tutorials: visit YouTube, lynda.com or go down a rabbit hole with Google search.
To download: visit the official GIMP website.
Conclusion
I hope that you found this tutorial helpful and look further into GIMP for your own digital projects, where you will see features similar to Photoshop. It’s amazing to think that a fully developed art portfolio can be created using GIMP. And it’s free.
Please feel free to reach out to us with questions or comments at MediaLab@lakeforestlibrary.org or make a 30-minute appointment at lakeforestlibrary.org/techhelp. We look forward to helping you!
Until next time, stay safe!